



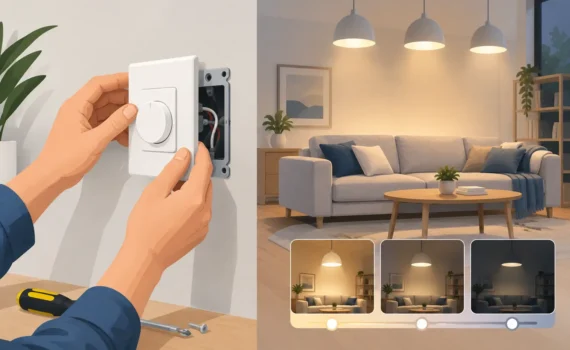
A dimmer can make a kitchen brighter for meal prep, soften a living room for movie night, and reduce glare in a commercial lobby. But dimmer switch installation is not always a simple switch swap. The right result depends on the light fixtures, bulbs, existing wiring, and the type of control you want.
For homeowners and property managers, the goal is straightforward: dependable lighting that adjusts smoothly, looks good, and does not buzz, flicker, or trip a breaker. Getting there starts with selecting compatible equipment and knowing when a licensed electrician should inspect the circuit.
What a Dimmer Switch Can Do
A dimmer regulates the amount of power sent to a compatible light. Instead of only turning lights on or off, it gives you control over brightness. That can improve comfort, extend the usable life of certain bulbs, and help manage energy use when lights are not needed at full output.
Dimmer controls come in several styles. A basic slide or rotary dimmer is a practical choice for a single room. Tap-style controls offer a cleaner appearance and can remember a preferred brightness setting. Smart dimmers may allow app control, schedules, voice control, or integration with other smart-home devices.
The best option depends on how the space is used. A dining room may benefit from a simple wall dimmer, while an entryway or storefront may need a multi-location control that lets users operate the same lights from more than one switch location.
Start With the Lights, Not the Switch
The most common dimming problems begin before the installation. Not every bulb, fixture, and dimmer is designed to work together.
LED lighting is especially common in Katy and Houston-area homes because it uses less energy and lasts longer than older incandescent bulbs. However, LEDs must be specifically labeled dimmable to work with a dimmer. Even then, the dimmer must be rated for LED loads. Using an older dimmer designed for incandescent lighting can lead to flickering, popping on at low settings, uneven brightness, or a limited dimming range.
Fixtures with integrated LED modules also require attention. Some are dimmable, some are not, and some need a particular dimmer type. The fixture manufacturer’s specifications should guide the selection. A dimmer that works well with one brand of LED recessed light may perform poorly with another.
Low-voltage landscape lights, under-cabinet lighting, ceiling fans, fluorescent fixtures, and certain specialty lighting systems may need a dedicated control. A standard wall dimmer should never be used as a fan-speed control. The devices may look similar, but they manage electrical loads differently.
Choosing the Right Dimmer Rating
Every dimmer has a maximum wattage or amp rating. That rating needs to account for every light controlled by that switch. For example, six 10-watt LED bulbs draw only 60 watts combined, but the dimmer must still be rated for LED use and for the type of fixture on the circuit.
LED dimmers generally have lower stated wattage limits than older incandescent dimmers, and minimum load requirements can matter as well. If a dimmer controls only one or two low-wattage LED bulbs, it may not dim smoothly unless the control is designed for a small LED load.
Compatibility charts from manufacturers can help, but real-world wiring conditions may still affect performance. An experienced electrician can identify whether the issue is the bulbs, the dimmer, the fixture driver, or the circuit itself before replacing parts that were not the problem.
Dimmer Switch Installation and Existing Wiring
A typical single-pole switch controls lights from one location. Replacing that switch with a compatible dimmer may be relatively straightforward when the wiring is in good condition and the electrical box has enough room.
The job becomes more involved when the lights are controlled from two or more locations. These are commonly called three-way or four-way switching arrangements. A compatible multi-location dimmer and matching accessory switches may be required. Installing the wrong device can leave one switch location inoperable or create confusing control behavior.
Older homes can add another layer of complexity. Some switch boxes do not have a neutral wire available, while many smart dimmers require one for reliable operation. Grounding, box size, wire condition, aluminum wiring, and the number of conductors in the box should also be evaluated. Crowding a large dimmer into a shallow or overfilled box is not a good solution.
If the switch plate is warm, the wiring insulation looks damaged, the lights dim unexpectedly, or the breaker has tripped, stop treating the project as a cosmetic upgrade. Those signs call for electrical troubleshooting before a new dimmer is installed.
Common Problems After a Dimmer Is Installed
A properly selected dimmer should provide a smooth transition from bright to low light. When it does not, the issue is usually identifiable.
Flickering at lower brightness levels often points to bulb and dimmer incompatibility. A buzzing sound can come from the dimmer, the bulbs, or a fixture transformer or driver. Lights that will not turn fully off may be caused by small amounts of current used by certain electronic dimmers. A dimmer that feels warm can be normal within its listed operating range, but excessive heat or a hot wall plate deserves prompt attention.
Another frequent concern is reduced brightness. Many LED-compatible dimmers can be adjusted to set the lowest dimming point. This helps prevent flicker and keeps lights from dropping too low. It does not, however, correct an incompatible bulb or failing fixture driver.
For commercial spaces, poor dimmer performance can affect more than appearance. Uneven lobby lighting, buzzing restaurant fixtures, or poorly controlled conference-room lights can distract customers and employees. The right control should support the lighting layout, daily operating hours, and the needs of the people using the space.
When to Call a Licensed Electrician
Changing a basic compatible dimmer in a newer, properly wired home may appear manageable. Still, electrical work carries real shock and fire risks, and a visual check alone cannot confirm that a circuit is safe or correctly wired.
Calling a licensed electrician is the practical choice when the project involves multi-way switches, smart controls, panel or breaker concerns, aluminum wiring, no neutral wire, damaged conductors, outdoor lighting, or a fixture that is already malfunctioning. It is also wise when several dimmers will be installed in one area, such as a remodel, kitchen upgrade, retail space, or office.
A professional installation includes more than attaching wires to a new device. The electrician verifies the circuit, confirms the load rating, checks grounding, secures the device in the box, tests every switch location, and leaves the work area clean. That process helps prevent the callbacks and repeat purchases that can follow a guess-and-check approach.
A Better Plan for Lighting Upgrades
Before scheduling dimmer work, make a quick note of the rooms involved, the number and type of fixtures, the bulb brands or fixture models, and whether the lights are controlled from more than one location. If you want smart-home features, decide whether you need app access, timers, voice control, or a simple wall control that anyone can use.
It also helps to think about the purpose of each room. Bright task lighting matters near kitchen counters, bathroom mirrors, workbenches, and office desks. Softer light is usually more useful in bedrooms, dining areas, media rooms, and reception spaces. One house or business may need several different dimmer types rather than one control used everywhere.
Beekman Electric provides FREE estimates for residential and commercial lighting upgrades throughout West Houston and nearby communities. A clear estimate and an on-site evaluation can help you choose controls that fit your fixtures, wiring, and budget without turning a small lighting improvement into an electrical headache.
The best dimmer is the one that feels effortless after the work is complete: lights respond smoothly, every switch location works as expected, and the room has the right amount of light whenever you need it.